
Anyway, let's finally get these guns on the tabletop!

To give the filler I will be using a better surface to grip on, I used a hobby knife to score the surface of the bases. A few years back I bought a couple extra packs of bases, then sat down and scored them all while listening to TV. I have enough to do a full-size company and attachments, so when I get new figs I just add the bases they came with to the queue and replenish the stock of pre-scored bases when the supply gets low.
Note: when something catches your attention during the mass-scoring process, stop moving the knife before you look up. Trust me on this one.
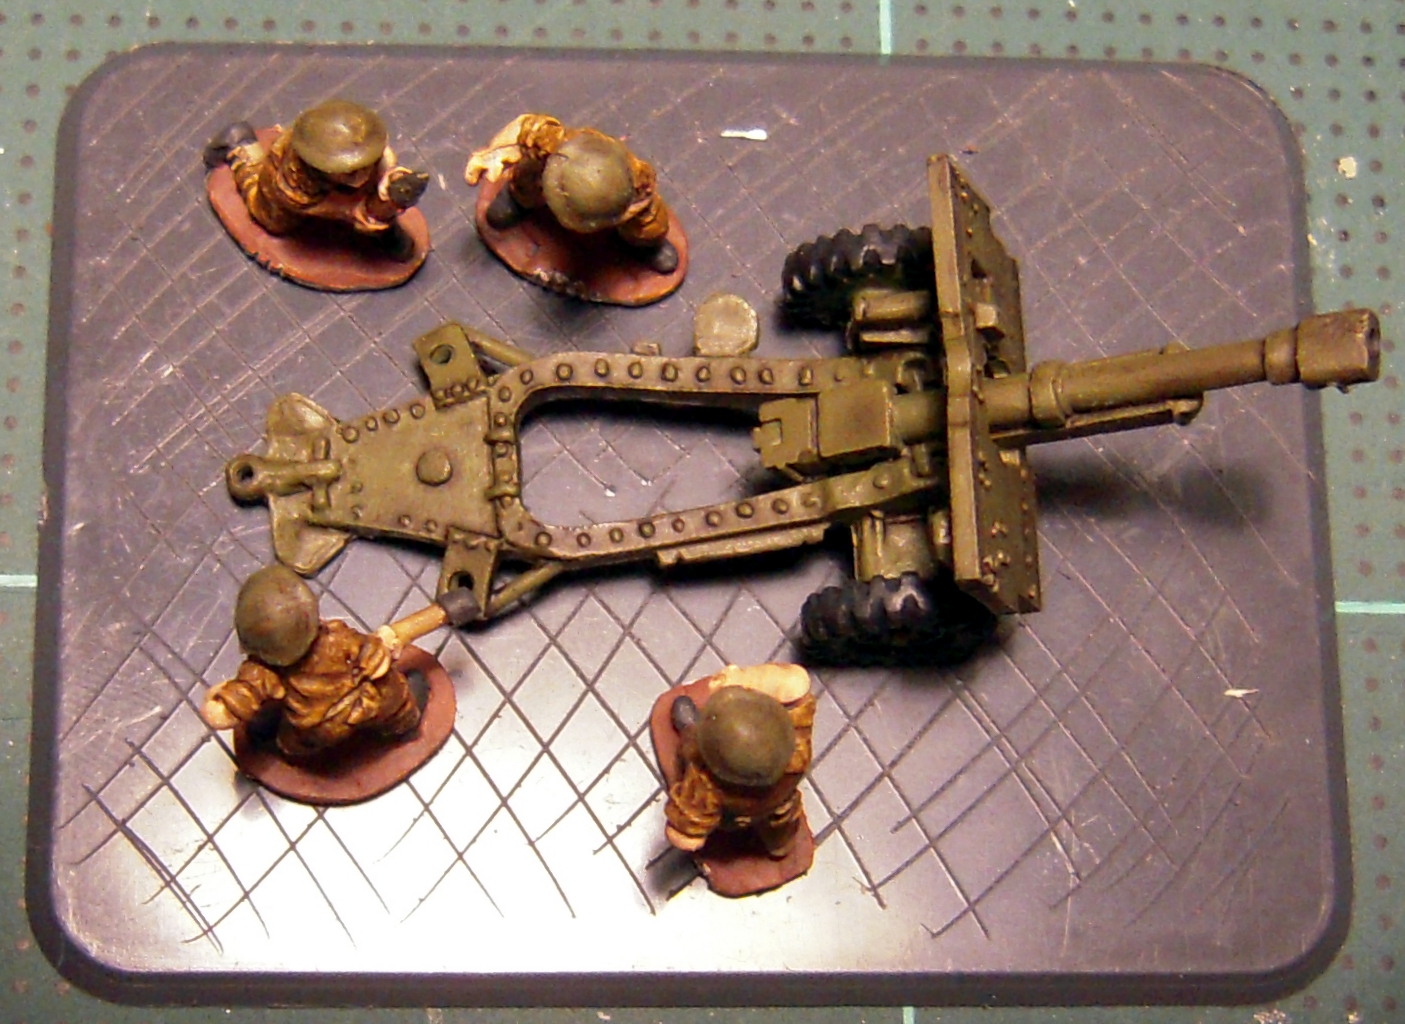
Before I put them into the basing materiel, I set the crew up on a spare base to arrange them how I wanted. There are enough crew that come with it for five or six figs per base, and enough pose variety to mix it up, so I went ahead and set up all eight gun bases. To ensure variety, I started with the guns themselves; some left, some right, and some centered. Every gun has a rammer, so I did them next, shifting positions from base to base. Crew carrying rounds came next, then the rest were pretty much a grab bag. Officers tended to go in the corners facing downrange, and NCOs in the corners facing the crews (you can tell which ones are NCOs by finding the ones that are yelling at the other crews to get their hands out of their pockets).
You can spread the crew out more if you shift the gun further forward than I have it, but I keep the barrel even with the edge of the base...less likely to get damaged in transport, and it fits better in the Battlefoam trays I use.

I don't care for the appearance when the dudes look like they are standing on a pedestal on the base, so I build up the base and embed them in it. Normally I use Vinyl Spackle (by Dap, I get it at Lowe's), but I had a mostly-empty tube of brown latex caulking left over from a terrain project, so I figured I'd give it a shot. I loaded it in the caulking gun (although you can get it in a smaller squeeze tube) and laid a few beads on some test bases to see how much I needed for proper coverage. The pictured amount is about right, but your mileage might vary. I used a little more, as it is easy to wipe excess off and use it to fill gaps after the dudes are stuck in.
Note 3: the Dap caulking I used, Premium Elastomeric Latex Sealant, comes with a 50-year guarantee...I wonder if that includes game performance?

So, after watching a few reruns of Ace of Cakes, I figured out the basic technique, and proceeded to frost my bases. You are shooting for a layer roughly equal to the thickness of the pedestal the models come on, but that thickness varies...so you will need to adjust fire as you go along. A little too thick is easier to correct than too thin, but both can be fixed without much hassle. The caulking skins over fairly quickly, though, so I would recommend only doing one large or medium base at a time, but small bases go quickly enough that you can do a pair at once. Wipe any extra you take off, and whatever is stuck to your finger, into a pile on a piece of paper...we may need it later.

Set your frosted base directly beside your layout (remember step two?), then set the turntable into the caulk so it corresponds to the position of the wheels. Don't push it all the way into the caulk...about halfway is enough for a good bond without causing the caulking to well up between the spokes.

One at a time, transfer your dudes from the layout base to the corresponding place on the frosted base. Make sure to push them all the way down to the plastic, or they will have a little wiggle left from caulk that is too deep to cure. They should have a ridge that pops up all around them...if they do, then you have the right thickness. Not too much, but if the ridge isn't higher than the pedestal, you need to lay the caulking thicker next time. For this one, though, you can add some of the extra from Step 4 to raise the surrounding level up. It will probably be quicker and easier, though, to just pull the guys out, add more caulking, them put them back in.

Time to get rid of the ridge of caulking around the crew that popped up in Step 6. I use a sculpting tool, but I used to use an old brush, and can't tell a difference in results. The thing to remember is that the caulk will stick to your tool, so use smoothing motions to spread the ridge slightly onto the figure base and blend it with the surrounding caulk. Also make sure the caulking is spread all the way to the edge of the bevel on the base; notice the difference between the bottom left edge of the Step 6 and Step 7 pictures? Seven gets it right. Also, where there is space, make the surface a little uneven...even if your final base is going to be completely covered with flocking, some variation looks more natural.

This is optional, but it is a good idea to set one of the artillery pieces onto the base to make sure the guys all fit properly. Lay it on gently, and it will come off without sticking. If you need to reposition guys, you can do so; pull them out of the caulk, smooth the hole over, then push them back in.

...the same process for your command teams, observers, and staff team. Leave the table, stool, and seated radio operator off the staff team, though...those go on later, as they don't have pedestals and it would be a pain to flock around them anyway.
While there is no requirement for what goes on the small bases to represent the different team types, I recommend you have a scheme that is easy to explain to an opponent. For example, my observers are the only ones that have a pair of binoculars, the section commanders have standing riflemen, and the battery commander is reaching for the radio mike (pictured at right).
Step 10: Dirty choices
At this point, I needed to decide which type of dirt I was going to use. On the left is Brown Fine Ballast by Woodland Scenics. I use this a lot for 28mm figures, as it gives a sence of depth to the flat surface, but at 15mm it is close to seeming a little off-scale. I have some 15mm teams based with this, but I decided to go with something I hadn't used before. I'll take the door on the right, Monte.
At this point, I needed to decide which type of dirt I was going to use. On the left is Brown Fine Ballast by Woodland Scenics. I use this a lot for 28mm figures, as it gives a sence of depth to the flat surface, but at 15mm it is close to seeming a little off-scale. I have some 15mm teams based with this, but I decided to go with something I hadn't used before. I'll take the door on the right, Monte.


Going for a dirty rather than rocky base, I picked up a bag of Cascade Brown Artificial Soil. To glue it down, I went with Gorilla Waterproof Wood Glue. It is pretty thick stuff, so I thinned it down with a detensioner mix; the surface tension on wood glue is pretty high, which means it will bead up on a smooth surface, so I used Surface Tension Breaker mixed with water to make it go on more like paint. A drop of liquid dishwashing detergent will break the surface tension the same way.
Applying the dirt is pretty straightforward: paint on the glue, sprinkle the dirt on until the no glue is showing, then let it dry. At this point, with most materials, I would turn it over and tap the base to get the excess off. However, the dirt is pretty absorbant, so I am going to leave the excess on so any places where the glue is on thicker will absorb up and give more irregularity to the surface.

I took the bases outside for the next part, as the dirt is, oddly enough, quite dusty. I ran the airgun over them (I suppose blowing on them would work as well, though not as dignified), then used a huge soft paintbrush to dust any remaining dirt off the dudes. Don't worry about tiny patches, if there are any, where the dirt didn't adhere to the base; it is brown under there anyway, and it the next two steps, it can become a moot (that's a fun word that is even more fun when written) point anyway. I like plans where the minor stuff is corrected later on rather than taking the time now, and this plan meets that criteria.

Using an old brush, I applied the same glue mix from Step 11 to irregular patched on the base. The big patches are just painted on, while the little scattered ones are put on with almost a drybrush technique; just a little paint on the brush, lay it almost parallel to the base, and gently sweep/dab it on so it hits the raised areas only. You don't have to do that, but I kind of like the end result as it blends the entire base together even though I am only going for about 50% coverage with the green.
On at least half of the figures, paint glue at least halfway under them; it looks odd if they are all standing on bare patches of ground. Not necessarily unrealistic, but it just seems somehow off. Same for the turntable, but don't worry about the ground under the spokes, as it will be hard to see there anyway.

Another easy step: take pinches of flock (I mix various colors of Woodland Scenics Fine Turf) and drop it on the entire base. There are a 1.2 bazillion (I counted with The Google) manufacturers; however, if you do a mix of colors, do a bunch extra, and store it for later use. Even if, after the process of doing infantry bases, you plan to never ever ever again build anything but fully tankified forces...trust me and keep the mix. It can be crazy hard to match a custom blend later, even if you write down the proportions. Besides, somebody else might like the look and want to borrow it.

Using the fluffy brush from Step 12, gently tamp the flock down so it embeds in the glue. Hold the brush parallel to the base for this, or it will shift the flock around and make it not stick as well, as well as getting a little clumpy. Let the glue dry fully before going on to the next step; doing all eight bases in sequence was enough time, unless you put the glue on quite thick or didn't thin it out enough. In either of those cases, let it sit overnight just in case.

Back to the fluffy brush! Turn the base upside down over the container of flock, and tap it to remove any excess. Then, use the brush to make sure no flock is sticking to the crew.
 Step 17: Gun placement
Easy step here. A small dot of superglue (remember, with cyanoacrylate glue, the thinner the layer the stronger the bond unless you are going to use an accelerator to cure it solid) under each tire, and a dab of the Gorilla Wood Glue under the trail (because the base where the trail sits is rough and porous, superglue won't work as well, and the Gorilla kicks as much butt as it's namesake).
 Step 18: Planting the grass
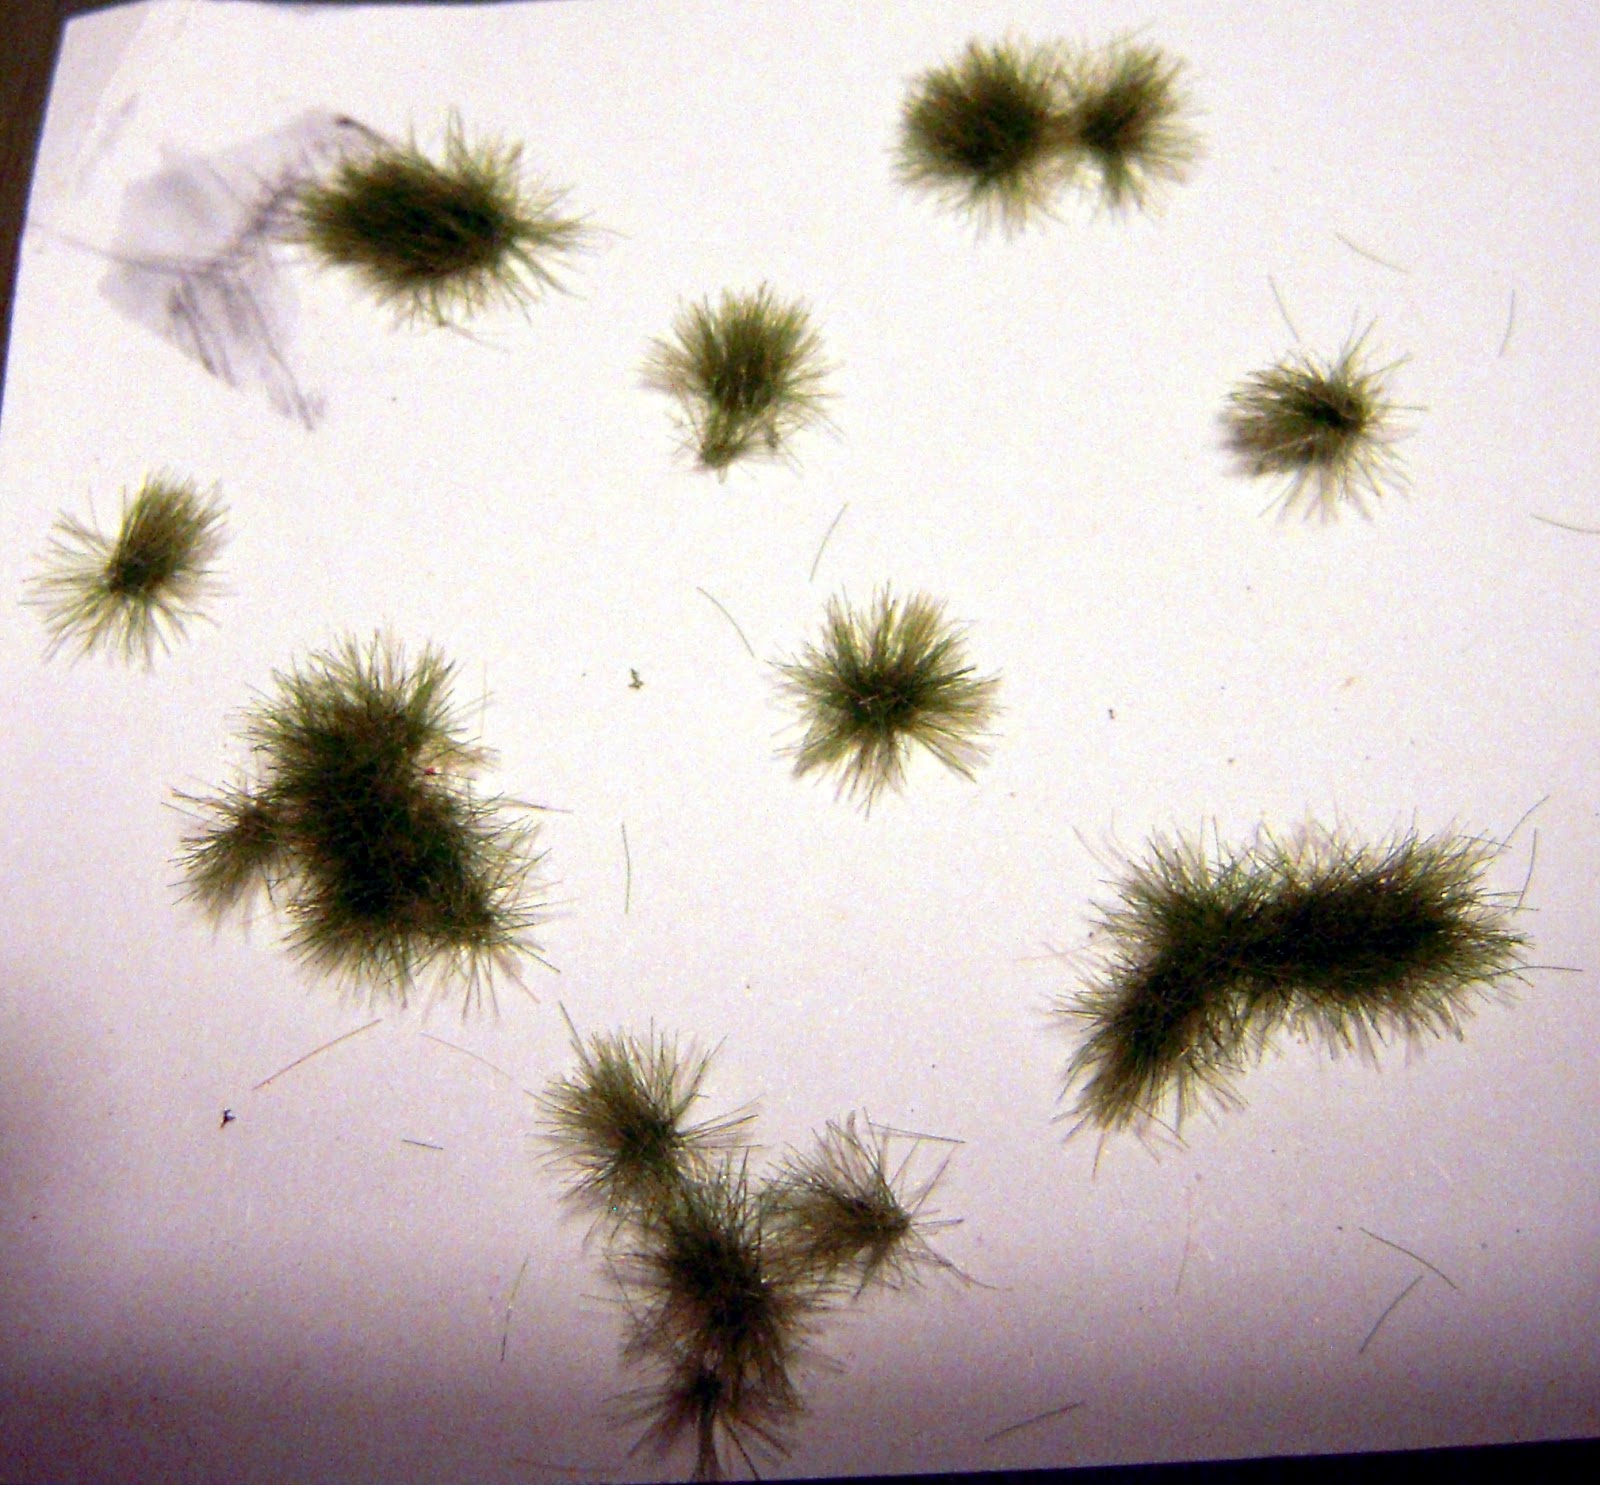
While you can call the base done at this point, and it will look fine, I like to have some 3-D elements on the base. In this case, I went with Tall Prairie Tufts Late Summer, an excellent product by MiniNatur. It comes in an 8"x10" sheet, which is enough to last ages; I got mine from Scenery Express.
Step 19: Finishing Steps
And now the home stretch! I like to paint the edge of the base, but with the basing material so dark, I didn't like the look of most of the typical colors. I tried a couple, then settled on a 50/50 mix of Vallejo Brown Leather and Vallejo Model Air Black. Using the airbrush color let me skip the step of thinning the paint (the Vallejo Model Color line is thicker than I like to paint with, so I normally thin it right in the bottle, but I also use the Brown Leather for drybrushing, so it is the original thickness), and I have a boatload of the black, so it was worth it to save a few seconds. Time becomes much more precious when it's past midnight, for some reason. Lastly, I hit it with a couple coats of matte varnish (I use Testor Dull Coat when I am going to do multiple matte coats, or Armory Matte if I only plan on a single coat).
Anyway, here's the final product: one of the eight tubes of MurderStonkReroll crazyness!


For the dedicated among you, here is a sample of the shell types used. I went with the plain black anti-tank round, because I'm
And call me when you get out of the asylum. With new glasses.
No comments:
Post a Comment